Showing posts with label Android. Show all posts

How To Hack WiFi Using Wps Wpa tester...?


Want to take advantage of your neighbor’s super fast Wi-Fi connection? If they’re smart, they probably have it password protected (otherwise you wouldn’t be reading this, would you?). But if you have an Android phone, you can get back at them for always parking in your spot and slamming the door when they get home at 2 a.m.—by stealing…er, borrowing, their connection.

So Today i am posting how to hack Wi-Fi password in less than 1 min with App Name WiFi Wps Wpa tester .

Requirements:

  •    1. Rooted Android Device (4.0+ recommend).

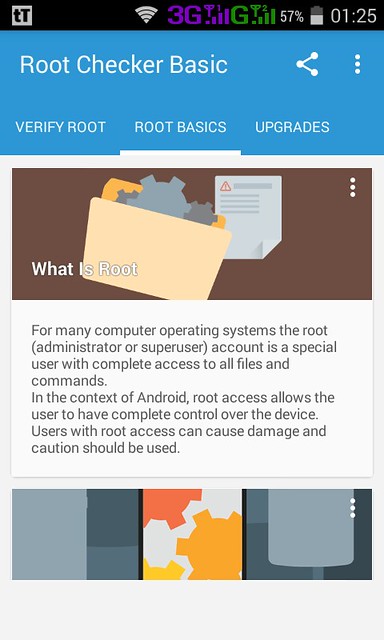
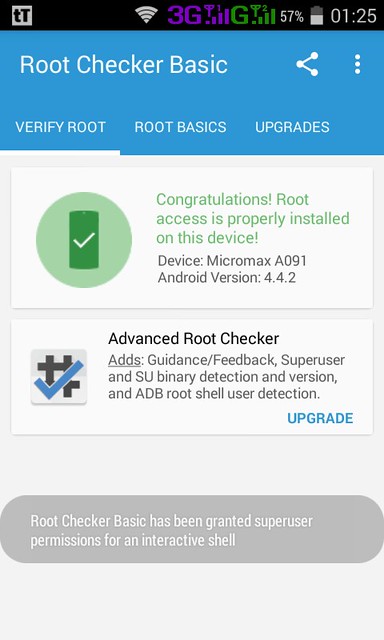
  • Root Checker

    About Root
  •    2. Wpa Wps Tester Premium 2.3.7 Cracked APK or later.
  •    3. Busybox Installed.
  •    4. Terminal Emulator installed. (no needed ).
  •    5. Recommended to use on high signal -60 or less.
HACK WiFi using WiFi Wps Wpa tester:

  •    1. Just download and Install Wpa Wps Tester Premium.
  •    2. Make Sure You Have Enabled The Unknown Sources In Settings/
  •    3. Open app and press refresh.
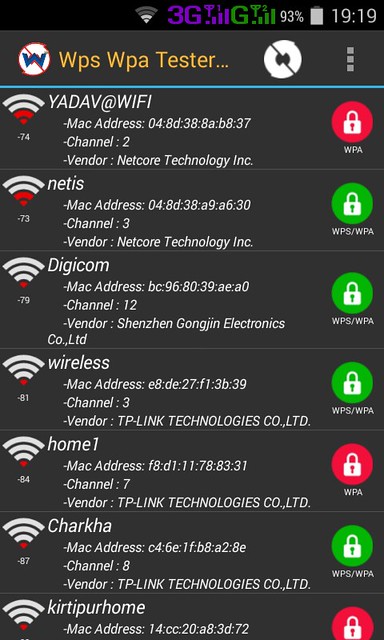
  •    4. Then the list of Wi-Fi networks available will be shown.

  • Scanned Wifi
  •    5. If you see a green Lock Icon click on it
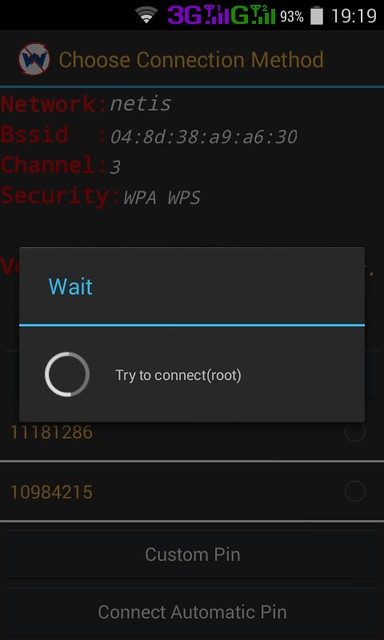
    Click on Connect Automatic Pin
  •    6. Press Connect Automatic Pin

  • Trying To Connect Wifi
  •    7. Copy the password and connect free hack Wi-Fi connection.

How to Unlock Android Phone Pattern Lock


The pattern lock tool that is built-in Android smart-phones is very useful in adding extra security to such devices. But when you by chance forgot the security pattern and can’t unlock the device, it can be very frustrating. Having such security measures is very important in protecting sensitive data in android devices.

Forgotten Security Pattern

Though this security tool is fairly easy to use, several wrong attempts may lock the device permanently. This is certainly a big problem, especially if you rely on your device in getting through your life’s busy schedule. Fortunately, if ever you forget the needed security pattern there is a way to reset and unlock your android device’s lock pattern as long as you can access your Gmail account.

Unlocking Pattern Without Google Account

How to Unlock Android Phone Pattern Lock
Knowing how to properly reset and unlock your android device’s lock pattern is essential in assuring continuous use. If ever you did use up your allowed chances in unlocking the device, and really forgotten the lock pattern, just simply follow these steps:
How to Unlock Android Phone Pattern Lock
    1. The first step is to turn off your android device, and wait for a couple of seconds before proceeding to the next step. 
    2. The next step is to press and hold the Home Key, Volume up, and the Power Button buttons together and wait until the device boots up. If in case your device does not have any home button, hold the power key and volume up key together. 
    3. A DOS like screen will appear with different options and by using the volume key in order to select up and down, depending on your device’s settings, scroll down and select “Delete all User Data” or “Restore Factory Defaults”
    4. After selecting the above settings, scroll down and select “Reboot System Now”, this will reboot the device and will allow you to set a new security pattern.
Unlocking Pattern with Google Account

How to Unlock Android Phone Pattern Lock
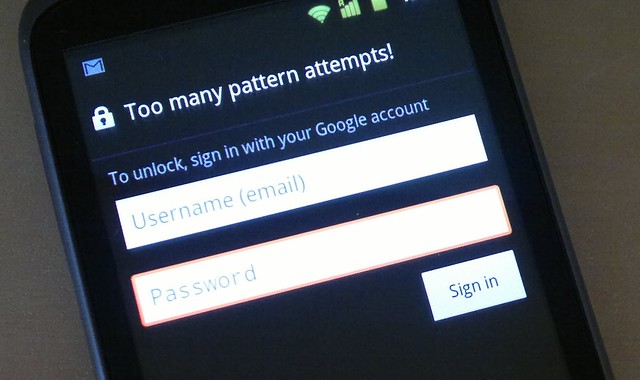
If you don’t want to do a device reboot and you already tried different patterns and still can’t unlock your device, usually five attempts, the following steps will guide you how to access your locked device:
    1. After several attempts a message will pop-up which will allow you to choose from two buttons, either “next” or “try again”. Select the “next” button and two ways in unlocking the device will be shown (“security question” and “provide Google account details”).
    2. If you were able to set your security question in your Google account, select this option and simply provide the correct answer and unlock the device quickly.
    3. If you didn’t set a security question, or forgotten the correct answer also, select the Google account button and then click “next”. After providing the Google account details (username and password) that are attached to the device, select “sign in”.
    4. You will be then directed to reset and choose a new security pattern and unlock the device with it.

How to view saved password of wifi on android device?


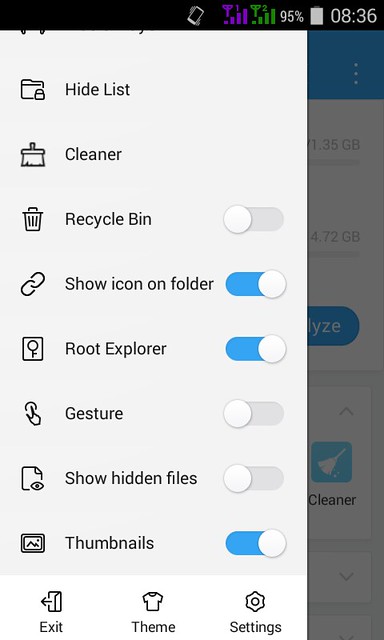
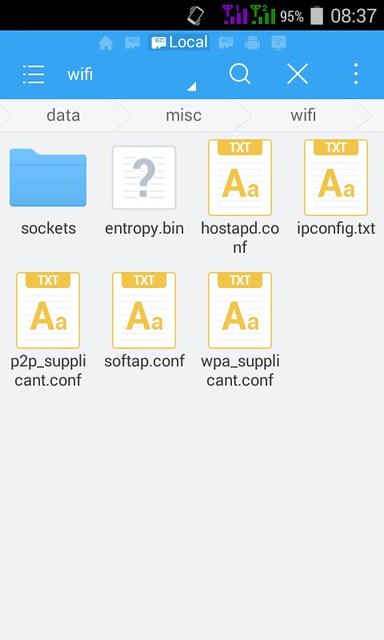
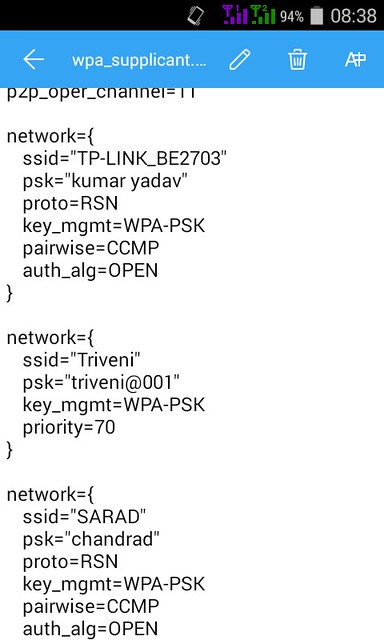
Install ES File Explorer then navigate to data/misc/wifi folder and you will find a file named wpa_supplicant.conf. Tap on the file to open it up and make sure you use ES File Explorer 's built-in text/HTML viewer for the task. In the file you should be able to see the network SSID and their passwords next to it.

Required:

Rooted Android Device and root privilege to ES File Manager.

Root Es File Manager

File Explore In Es File Manager

View Password

Now, you can see the ssid and password saved on your android.

How to use Android as a Webcam


camera to webcam
Requirements:
  • Android Mobile
  • Google or Firefox Browser
Steps to Follow:-
Step 1: Download and install IP webcam for Android and PC.
Step 2: Run App on your android device and change the settings of the device according to your requirements. You could change the video quality, which camera to use, rear and main, username, password, etc.
Step 3: After changing the settings, click on Start Server.
Step 4: An IP address would start showing on the bottom of the App of your android phone.
Step 5: Run IP Webcam application on PC and fill the IP address and Port under Camera Feed URL. Now click on AutoDetect.
Now your device’s Camera is synced with your PC which you can use to replace with your bad quality webcam. 

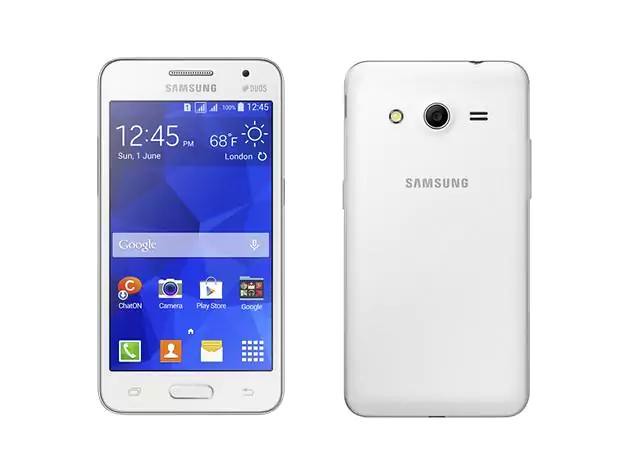
How to root Samsung Galaxy Core 2 (SM-G355H)


samsung_galaxy_core_ii

Detailed steps:
1. Download the file attached in this post and copy it into your external SD card
2. Switch off your phone and boot into recovery by holding Volume Up + Power + Home buttons (Stock recovery is able to flash this file)
3. Navigate by pressing the Volume Up/Down button and choose "Apply update from external storage" by using the Power button.
4. Select the file UPDATE-Kinguser-3.4.0.zip
5. The phone will auto reboot and gives root access
6. To check root access download and install Root Checker from Google Play Store. 

Attached Files     File Type: zip UPDATE-Kinguser-3.4.0.zip 


Source: Internet

Track your lost Android device with Google’s Android Device Manager


Requirements:
  • Your device is connected with your Google account.
  • Your device has access to the internet.
  • Allowed Android Device Manager (ADM) to locate your device (turned on by default). This can changed in the Google Settings app.
  • Allowed ADM to lock your device and erase its data (turned off by default).
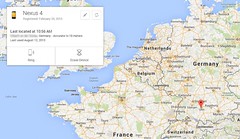
Android Device Manager is a Google’s official and easy-to-use tool to track your Android phone or tablet. The best thing about it is that you don’t need to install an app to be able to track your devices. The only requirement is that your device is connected to your Google account, turned on and connected to the internet. All you need to do is visit the Android Device Manager while being logged into your Google Account. Once the site is loaded it will automatically try to track down your phone. If you have several Android devices registered, make sure the right one is chosen in the dropdown menu.
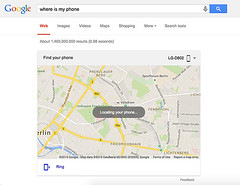
In a recent update, Google implemented some of ADM’s features into their search results page. This means that you’re able to quickly locate any registered Android device right from the search results. By using the search phrase “where is my phone”, Google displays a little map above the search results in which it will try to find your phone. Once found, you can let it ring by clicking on “Ring” at the bottom left.
android-device-manager-search
Although this makes it more convenient to find your phone quickly, it won’t offer you all the options you get with the full version of Android Device Manager.
Using ADM, you are able to track your registered Android devices, let your phone ring and wipe your phone’s data (which has to be enabled manually). Besides that, ADM doesn’t offer more options to remote control your phone. I hope that Google keeps improving it and introduces more helpful features, such as  taking pictures in case it got stolen and you want to take a snapshot of the person who took it.
In case there’s no laptop around when you lose your device, you can also use someone else’s Android phone to track it. Instead of using the mobile browser, you can also use the Android Device Manager app. If you the other phone doesn’t have it, simply download it here. You can sign in using the guest mode and your Google account credentials. Now you should be able to track your lost device, let it ring or wipe its data.
Android-Device-Manager
Are you not able to locate your phone this way? This can happen for several reasons. The one you should hope for, is that your device is simply not connected to the internet or turned off. In that case, simply keep trying to track it until it (hopefully) connects to Google’s services again.
In case it got stolen, it’s possible that the thief has disconnected your device from your Google Account. If that happens, neither Android Device Manager nor any other tracking tool will be able to locate the device, since it’s necessary to be logged into your Google Account. This doesn’t apply to previously installed tracking apps but in this scenario there are none on the phone. However, there’s one last resort but more on that later.
Source: Internet

iRoot Guide – Rooting Guide for Any Android Device


Android is the most popular smartphone operating systems in the market till now. It offers a variety of apps and settings but, eventually reach their usage and customization limits at a certain point. Rooting your android device (smartphone or tablet) will offer you thousands of tweaks, skins and new apps that you should not miss out.
Root-Your-Device-Rooting-Guide-for-Any-Android-Device
In this Rooting guide, we’ll be using iRoot. iRoot is a rooting software that supports more than 150,000 devices from Android OS 2.2 to 4.4. This number is still growing though.
iRoot is also known as Root Master. It’s a Windows Application that helps you to root your android phone in a single click. Here, u can see ‘How to use iRoot to Root your Android Device?’.
Important points to remember:
  • Your Android Device’s data like contacts, pictures, videos, and music etc won’t be affected with this method.
  • Your Android Device’s warranty may be void after this process.
How to use iRoot? – iRoot Guide [Rooting Guide for any Android Device]
Done!
1. Enable USB Debugging in your phone from Developer options.
(To enable Developer options go to Settings >> About phone >> Tap 5 times on Build Number)
2. If you’ve not installed USB drivers for your device then wait for the device to automatically install them. If it doesn’t, then download them from web.
3. Download and install iRoot.
4. After successful installation, open it.
iRoot
5. Connect your Android device to the computer.
Connect-Device
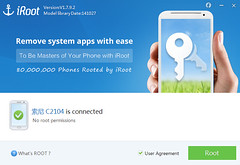
Once your device is successfully connected to iRoot, it will automatically detect your device.
6. Now click on “Root” to start rooting process.
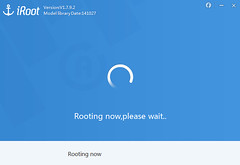
Rooting
WARNING: Don’t touch USB cable while rooting is being done as any interruptions may cause hard-brick (permanent device failure) to your device.
Once successful root, your phone will automatically reboot.
7. Now download and install SuperSU from Google Play store to control root permissions.
That’s all. Your device is now successfully rooted. To check whether your device is successfully rooted or not download Root Checker from Play Store.
Source: Internet