Install LaTeX on Ubuntu or Debian

12:55:00 PM Mahesh Kumar Yadav 0 Comments


Latex

LaTeX is a document markup language and a text preparation system to create documents. LaTeX is recommended to create technical or scientific articles, papers, reports, books and other documents like PhDs.

1. OPEN YOUR TERMINAL
A terminal is a Command Line Interface (CLI) where you type commands to tell the computer what to do. Make sure you've opened the terminal, if so, continues in the next step.
2. INSTALL TEX LIVE
TeX Live is a TeX distribution to get up and running with the TeX document production system. To install it, once you're in the terminal, enter the following command:
sudo apt-get install texlive-full
Then, type your 'sudo' password and you'll have installed Tex Live. This operation may take a long time.
3. INSTALL TEXMAKER
Now you need a text editor. I recommend using a specific editor for LaTeX. There are many text editors for LaTeX on the Internet as Kile, TeXworks, JLatexEditor, Gedit LaTeX Plugin, etc. My favorite text editor for Latex is Texmaker. Texmaker is a cross-platform open source LaTeX editor. To install it, go to the Ubuntu or Debian terminal and enter the following command:
sudo apt-get install texmaker
In a few minutes you'll have installed Texmaker.
4. CREATE YOUR FIRST DOCUMENT
To check that everything is working properly, create a LaTeX blank document. Open Texmaker and click on File, New. Then write the following code:
\documentclass{article}
\begin{document}
    Hello, world!
\end{document}
Now save the document as a 'tex' file going to File, Save. Finally, compile the document clicking on Tools, PDFLaTeX. Make sure the 'pdf' file has been created and it's working. And that's it! You've created your first LaTeX document!

0 comments :

how to delete all commit history in github? [duplicate]

4:49:00 PM Mahesh Kumar Yadav 2 Comments

Deleting the .git folder may cause problems in your git repository. If you want to delete all your commit history but keep the code in its current state, it is very safe to do it as in the following:
  1. Checkout
    git checkout --orphan latest_branch
  2. Add all the files
    git add -A
  3. Commit the changes
    git commit -am "commit message"
  4. Delete the branch
    git branch -D master
  5. Rename the current branch to master
    git branch -m master
  6. Finally, force update your repository
    git push -f origin master
Hope this helps. this will not keep your old commit history around :)

2 comments :

How To Install Sublime Text 3 (Build 3103) On Ubuntu 16.04, Ubuntu 15.10, Ubuntu 14.04 And Derivatives.

3:49:00 PM Mahesh Kumar Yadav 0 Comments


Sublime

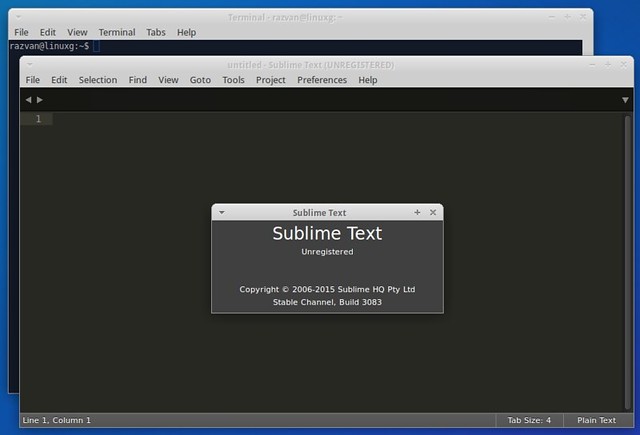
Installation instructions:

In order to successfully install Sublime Text 3 on Ubuntu 16.04 Xenial Xerus, Ubuntu 15.10 Wily Werewolf, Ubuntu 14.04 Trusty Tahr, Linux Mint 17.x, Elementary OS 0.3 Freya and other Ubuntu derivative systems, you have to add the PPA to your system, update the local repository index and install the sublime-text-installer:
$ sudo add-apt-repository ppa:webupd8team/sublime-text-3
$ sudo apt-get update
$ sudo apt-get install sublime-text-installer
Optional, to remove sublime text, do:
$ sudo apt-get remove sublime-text-installer

0 comments :

Fix time differences between Ubuntu and Windows

1:53:00 PM Mahesh Kumar Yadav 0 Comments


A. To fix the UTC / local time difference between Ubuntu and Windows from Ubuntu by making Ubuntu uses local time.

Before proceeding, note that according to the Ubuntu wiki, "the advantage of having the hardware clock as UTC is that you don't need to change the hardware clock when moving between timezones or when Daylight Savings Time (DST) begins or ends as UTC does not have DST or timezone offsets". So this is not recommended and if you can, you should use method B., and fix this from Windows.

For Ubuntu 16.04 and newer, run the following command (thanks to Erwinson Pagtalunan for the update!):
timedatectl set-local-rtc 1

You can then check if Ubuntu uses local time, you can then use the following command:
timedatectl
Which should display the following "RTC in local TZ: yes". A warning will also be displayed. Here's the full command output:
$ timedatectl
      Local time: Lu 2016-04-25 12:18:22 EEST
  Universal time: Lu 2016-04-25 09:18:22 UTC
        RTC time: Lu 2016-04-25 12:18:22
       Time zone: Europe/Bucharest (EEST, +0300)
 Network time on: yes
NTP synchronized: no
 RTC in local TZ: yes

Warning: The system is configured to read the RTC time in the local time zone.
         This mode can not be fully supported. It will create various problems
         with time zone changes and daylight saving time adjustments. The RTC
         time is never updated, it relies on external facilities to maintain it.
         If at all possible, use RTC in UTC by calling
         'timedatectl set-local-rtc 0'.

For Ubuntu versions older than 16.04: you must edit the /etc/default/rcS file and replace "UTC=yes" with "UTC=no" (both without the quotes). To do this automatically, simply copy/paste the following command in a terminal:
sudo sed -i 's/UTC=yes/UTC=no/' /etc/default/rcS
And then reboot.


B. To fix this from Windows (it should work with Vista SP2, Windows 7, Server 2008 R2 and Windows 8/8.1), by making it uses UTC instead of local time, download THIS Windows registry file and simply double click it.

Then, to disable the Windows Time service (which still writes local time to RTC regardless of the registry setting above, on shutdown), run Command Prompt as Administrator and paste this command:
sc config w32time start= disabled
And reboot.


How to revert the changes


A. From Ubuntu: reverting this change from Ubuntu is pretty easy.

Ubuntu 16.04 and newer: to revert the changes, simply run the following command:
timedatectl set-local-rtc 0

Ubuntu versions older than 16.04: all you have to do is replace "UTC=no" with "UTC=yes" in the/etc/default/rcS file. To do this automatically, copy/paste the command below in a terminal:
sudo sed -i 's/UTC=no/UTC=yes/' /etc/default/rcS
And then reboot your computer.

B. From Windows: reverting this change is a bit more complicated from Windows. 

Firstly, open the .reg file downloaded when applying the fix for Windows (see download link above) with a text editor and change the "RealTimeIsUniversal" value from "dword:00000001" to "-" (without the quotes). Here's how the file should look like after making this change:
Windows Registry Editor Version 5.00

[HKEY_LOCAL_MACHINE\SYSTEM\CurrentControlSet\Control\TimeZoneInformation]
"RealTimeIsUniversal"=-
Then save the file and double click it. 

Next, run the following command in Command Prompt (which you need to run as Administrator) to re-enable the Windows Time service:
sc config w32time start= demand
And finally, reboot.


References / more information:
                                                                                                                                       Source: online

0 comments :

Accesing mutlple users to Read/Write and Execute on same File/Folder in linux

10:05:00 PM Mahesh Kumar Yadav 0 Comments


Open Terminal:

1. Create a group

sudo addgroup linux-data

2. Add users to group

sudo adduser mahesh linux-data
sudo adduser kumar linux-data 

3. Change group ownership

sudo chgrp -R linux-data /media/mahesh/Linux-drive

4. Assign Read/Write and Execute permission to group

sudo chmod -R g+rwx /media/mahesh/Linux-drive
sudo chmod -R g+s /media/mahesh/Linux-drive 

0 comments :

How to get sudo to prompt you for a password each time in linux

10:44:00 AM Mahesh Kumar Yadav 1 Comments


Open Terminal and type:
sudo visudo
Then scroll down to the line that reads:
Defaults        env_reset
And change it to:
Defaults        env_reset,timestamp_timeout=0
You can change 0 to any values (time in minutes). Setting it to 0 will ask for your password every time and -1 will make it never ask. The default is 15 according to man sudo 8, but some manuals say the default is 5. Have a look at the RootSudoTimeout wiki for more information.
Press CTRL + X to finish editing, Y to save changes, and ENTER to exit.

1 comments :

How to change disk checking (fsck) frequency at boot?

10:11:00 PM Mahesh Kumar Yadav 1 Comments


Ubuntu checks the root partition at about every 30th boot. If you have a desktop machine/laptop that you switch off every day, this number may be too small. In this case you can safely increase this number to 50 at least.
First, figure out where your root partition is using the df command which produces this result in my case:
Filesystem           1K-blocks      Used Available Use% Mounted on
/dev/sda6             30850168   9374588  19908444  33% /
/dev/sda8            129636480  52663092  76973388  41% /media/DATA
So my root partition (‘/‘) is at /dev/sda6.
Then check out your disk checking frequency:
sudo dumpe2fs /dev/sda6 | grep -i "mount count"
Where you need to replace /dev/sda6 with the value that is specific to your root partition. Its output is something like this:
dumpe2fs 1.42.13 (17-May-2015)
Mount count:              12
Maximum mount count:      26
Finally, if I want to increase the frequency to 50:
sudo tune2fs -c 50 /dev/sda6 
To disable file system integrity check for forever. Type following command
sudo tune2fs -c -1 /dev/sda6 
To check after 1 month. Type following command
sudo tune2fs -i 1m /dev/sda6 
List  the  contents  of the filesystem superblock, including the current values of the parameters that can be set via  this  pro‐gram.
sudo tune2fs -l /dev/sda6
Where, again, you might need to replace /dev/sda6.

1 comments :

How To Stop Wi-Fi Stealing And Catch That Person

11:00:00 AM Mahesh Kumar Yadav 0 Comments


backdoor-Netis-Netcore-Router
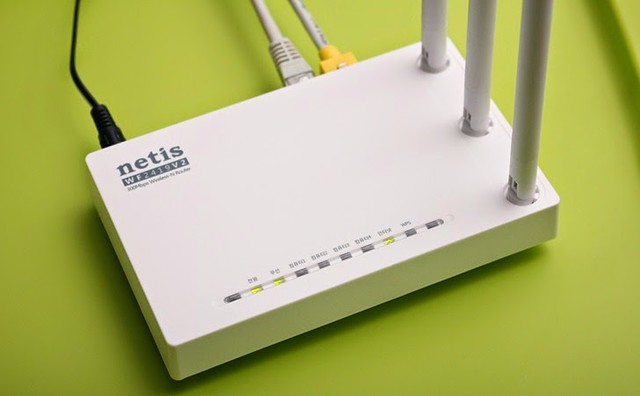
Often we are unable to locate an uninvited user who uses our Wi-Fi. If someone uses our Wi-Fi without our knowledge, that would be termed as Wi-Fi stealing.Whatever be the case, to be on the safer side, we must know who is using my Wi-Fi without my permission and how can we stop them. So, here are the steps

Login to your router

Different routers support different login styles. So, I am listing a few of the logging in style, out of these, one might work for you:
  • 1. Punch in the IP address of your router in your browser address bar directly like 192.168.0.1 or 192.168.1.1
  • 2. If the above address does not work, you can also try routerlogin.com and it will redirect to your router admin panel.
  • 3. Enter the administrator username and password.
  • 4. nce you are inside the admin panel, look for menu options like ‘Connected devices’ or ‘Attached devices’.
  • 5. If you are able to find that menu, you can see the MAC Address, IP Address and Device name of all the devices which are connected to your network. This is how my Attached devices looks like.
  • 6. If you see some extra person’s name or some extra device then they are the one who might be using your Wi-Fi without your permission. Read on to know the steps to stop Wi-Fi stealing.

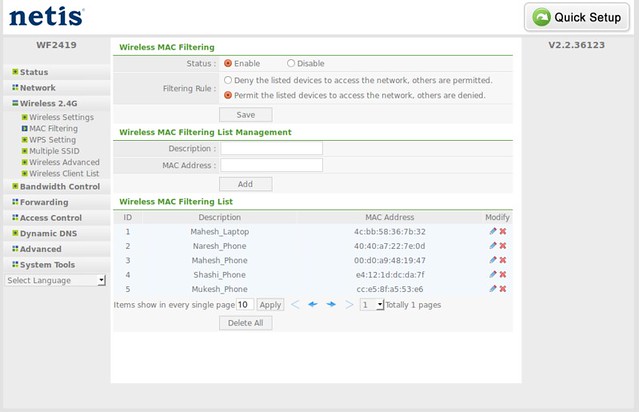
Mac Filtering

How to stop someone from Wi-Fi stealing?

Once you come to a conclusion that someone else is making use of your Wi-Fi resources, you can simply change the password of your Wi-Fi to a stronger password. You can also switch off your SSID broadcast.
If you want a stricter action, you can set up a filter based on the MAC address of the devices.

0 comments :

How To Hack WiFi Using Wps Wpa tester...?

12:53:00 AM Mahesh Kumar Yadav 5 Comments


Want to take advantage of your neighbor’s super fast Wi-Fi connection? If they’re smart, they probably have it password protected (otherwise you wouldn’t be reading this, would you?). But if you have an Android phone, you can get back at them for always parking in your spot and slamming the door when they get home at 2 a.m.—by stealing…er, borrowing, their connection.

So Today i am posting how to hack Wi-Fi password in less than 1 min with App Name WiFi Wps Wpa tester .

Requirements:

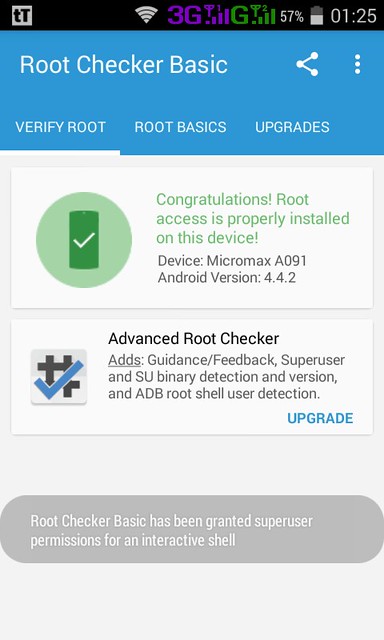
  •    1. Rooted Android Device (4.0+ recommend).

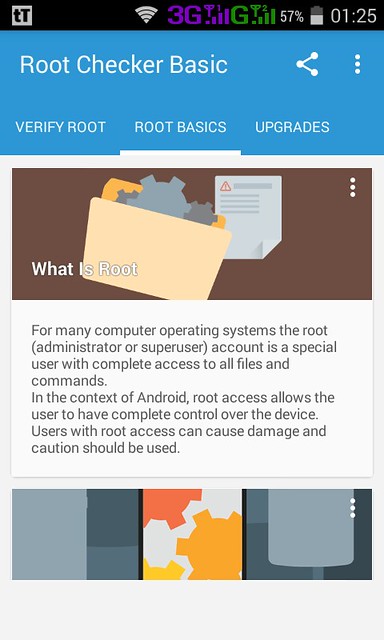
  • Root Checker

    About Root
  •    2. Wpa Wps Tester Premium 2.3.7 Cracked APK or later.
  •    3. Busybox Installed.
  •    4. Terminal Emulator installed. (no needed ).
  •    5. Recommended to use on high signal -60 or less.

HACK WiFi using WiFi Wps Wpa tester:

  •    1. Just download and Install Wpa Wps Tester Premium.
  •    2. Make Sure You Have Enabled The Unknown Sources In Settings/
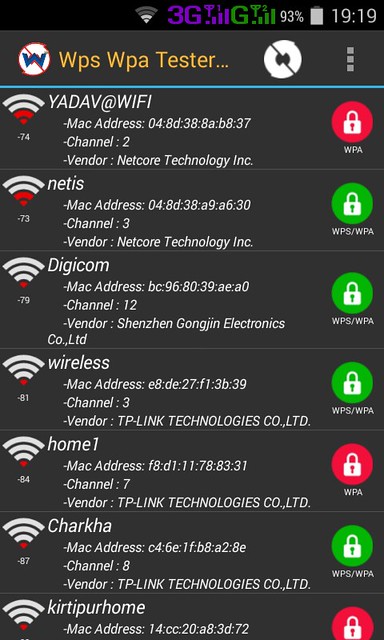
  •    3. Open app and press refresh.
  •    4. Then the list of Wi-Fi networks available will be shown.

  • Scanned Wifi
  •    5. If you see a green Lock Icon click on it

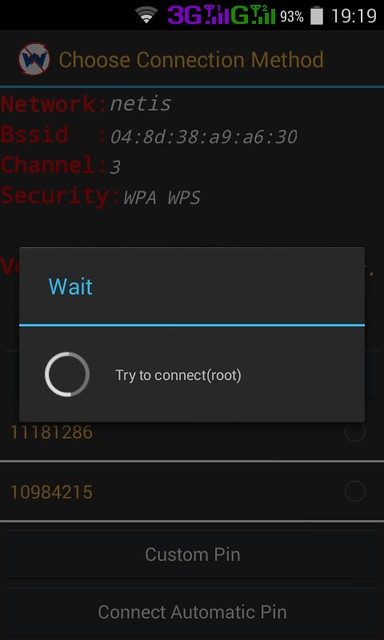
    Click on Connect Automatic Pin
  •    6. Press Connect Automatic Pin

  • Trying To Connect Wifi
  •    7. Copy the password and connect free hack Wi-Fi connection.

5 comments :

How to Unlock Android Phone Pattern Lock

9:59:00 AM Mahesh Kumar Yadav 1 Comments


The pattern lock tool that is built-in Android smart-phones is very useful in adding extra security to such devices. But when you by chance forgot the security pattern and can’t unlock the device, it can be very frustrating. Having such security measures is very important in protecting sensitive data in android devices.

Forgotten Security Pattern

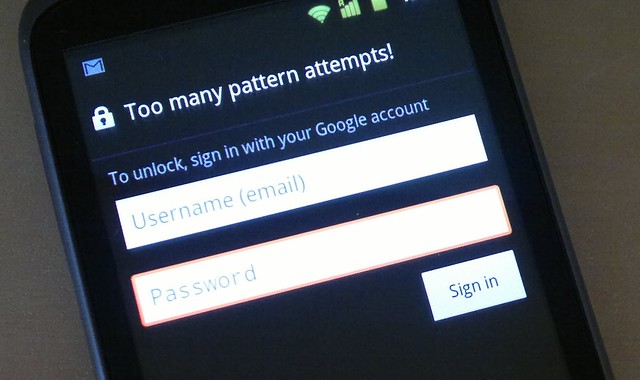
Though this security tool is fairly easy to use, several wrong attempts may lock the device permanently. This is certainly a big problem, especially if you rely on your device in getting through your life’s busy schedule. Fortunately, if ever you forget the needed security pattern there is a way to reset and unlock your android device’s lock pattern as long as you can access your Gmail account.

Unlocking Pattern Without Google Account

How to Unlock Android Phone Pattern Lock
Knowing how to properly reset and unlock your android device’s lock pattern is essential in assuring continuous use. If ever you did use up your allowed chances in unlocking the device, and really forgotten the lock pattern, just simply follow these steps:
How to Unlock Android Phone Pattern Lock
    1. The first step is to turn off your android device, and wait for a couple of seconds before proceeding to the next step. 
    2. The next step is to press and hold the Home Key, Volume up, and the Power Button buttons together and wait until the device boots up. If in case your device does not have any home button, hold the power key and volume up key together. 
    3. A DOS like screen will appear with different options and by using the volume key in order to select up and down, depending on your device’s settings, scroll down and select “Delete all User Data” or “Restore Factory Defaults”
    4. After selecting the above settings, scroll down and select “Reboot System Now”, this will reboot the device and will allow you to set a new security pattern.
Unlocking Pattern with Google Account

How to Unlock Android Phone Pattern Lock
If you don’t want to do a device reboot and you already tried different patterns and still can’t unlock your device, usually five attempts, the following steps will guide you how to access your locked device:
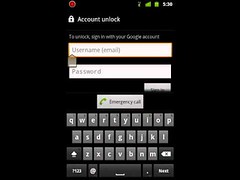
    1. After several attempts a message will pop-up which will allow you to choose from two buttons, either “next” or “try again”. Select the “next” button and two ways in unlocking the device will be shown (“security question” and “provide Google account details”).
    2. If you were able to set your security question in your Google account, select this option and simply provide the correct answer and unlock the device quickly.
    3. If you didn’t set a security question, or forgotten the correct answer also, select the Google account button and then click “next”. After providing the Google account details (username and password) that are attached to the device, select “sign in”.
    4. You will be then directed to reset and choose a new security pattern and unlock the device with it.

1 comments :

How do I find out BIOS version using a Linux command line option?

10:50:00 PM Mahesh Kumar Yadav 1 Comments


To find out BIOS version under Linux operating systems use the dmidecode command which is a tool to analyse BIOS data. I have tested on 'Dell 3542 i5 4th Gen'. You must login as admin to run dmidecode command:

sudo dmidecode | less

Output

 # dmidecode 2.12

# SMBIOS entry point at 0x000f04c0

SMBIOS 2.8 present.

45 structures occupying 2092 bytes.

Table at 0x000EC720.

Handle 0xDA00, DMI type 218, 251 bytes

OEM-specific Type

        Header and Data:

                DA FB 00 DA B2 00 0D 5F 0F 37 40 7D 00 00 00 00

                00 7E 00 01 00 00 00 75 01 01 80 01 00 76 01 02

                80 01 00 2D 01 03 80 01 00 2E 01 04 80 00 00 4F

                02 05 80 01 00 50 02 06 80 00 00 E2 01 02 00 00

                00 E1 01 02 00 01 00 E3 01 02 00 02 00 58 02 20

                80 00 00 57 02 20 80 01 00 9C 00 03 00 01 00 9B

                00 03 00 00 00 8A 01 04 00 01 00 89 01 04 00 00

                00 7F 01 05 00 00 00 80 01 05 00 01 00 53 01 06

                00 00 00 52 01 06 00 01 00 7B 01 07 00 00 00 7C

                01 07 00 01 00 94 01 08 00 00 00 93 01 08 00 01

                00 7D 00 09 00 00 00 2D 00 0A 00 01 00 2E 00 0A

                00 00 00 6E 00 0B 00 00 00 95 00 0C 00 01 00 96

                00 0C 00 00 00 2F 02 0D 00 01 00 30 02 0D 00 00

                00 4B 01 0E 00 01 00 4A 01 0E 00 00 00 37 01 0F

                00 00 00 38 01 0F 00 01 00 39 01 0F 00 02 00 2E

                02 07 80 01 00 FF FF 00 00 00 00

Handle 0xDA01, DMI type 218, 35 bytes

OEM-specific Type

        Header and Data:

                DA 23 01 DA B2 00 0D 5F 0F 37 40 2D 02 08 80 01

                00 4F 03 09 80 01 00 50 03 0A 80 01 00 FF FF 00

                00 00 00

Handle 0x0000, DMI type 0, 24 bytes

BIOS Information

        Vendor: Dell Inc.

        Version: A09

        Release Date: 10/16/2015

        Address: 0xF0000

        Runtime Size: 64 kB

 ROM Size: 2048 kB

        Characteristics:

                MCA is supported

                PCI is supported

                BIOS is upgradeable

                BIOS shadowing is allowed

                ESCD support is available

                Boot from CD is supported

                Selectable boot is supported

                BIOS ROM is socketed

                EDD is supported

                5.25"/1.2 MB floppy services are supported (int 13h)

                3.5"/720 kB floppy services are supported (int 13h)

                3.5"/2.88 MB floppy services are supported (int 13h)

                Print screen service is supported (int 5h)

                8042 keyboard services are supported (int 9h)

                Serial services are supported (int 14h)

                Printer services are supported (int 17h)

                CGA/mono video services are supported (int 10h)

                ACPI is supported

                USB legacy is supported

                ATAPI Zip drive boot is supported

                BIOS boot specification is supported

                Targeted content distribution is supported

                UEFI is supported

        BIOS Revision: 65.9

Handle 0x002E, DMI type 13, 22 bytes

BIOS Language Information

        Language Description Format: Long

        Installable Languages: 1 en|US|iso8859-1

        Currently Installed Language: en|US|iso8859-1

Handle 0x002D, DMI type 131, 64 bytes

OEM-specific Type

        Header and Data:

                83 40 2D 00 31 00 00 00 00 00 00 00 00 00 00 00

                F8 00 43 9C 00 00 00 00 01 00 00 00 05 00 09 00

                9C 07 37 00 00 00 00 00 C8 00 FF FF 00 00 00 00

                00 00 00 00 26 00 00 00 76 50 72 6F 00 00 00 00

Handle 0x002C, DMI type 136, 6 bytes

OEM-specific Type

        Header and Data:

                88 06 2C 00 5A 5A

Handle 0x001B, DMI type 19, 31 bytes

Memory Array Mapped Address

        Starting Address: 0x00000000000

        Ending Address: 0x000FFFFFFFF

        Range Size: 4 GB

        Physical Array Handle: 0x0007

        Partition Width: 1

Handle 0x001A, DMI type 20, 35 bytes

Memory Device Mapped Address

        Starting Address: 0x00000000000

        Ending Address: 0x000FFFFFFFF

        Range Size: 4 GB

        Physical Device Handle: 0x0017

        Memory Array Mapped Address Handle: 0x001B

        Partition Row Position: 1

        Interleave Position: 1

        Interleaved Data Depth: 1

Handle 0x0017, DMI type 17, 40 bytes

Memory Device

        Array Handle: 0x0007

        Error Information Handle: Not Provided

        Total Width: 64 bits

        Data Width: 64 bits

        Size: 4096 MB

        Form Factor: SODIMM

        Set: None

Locator: DIMM_A

        Bank Locator: Bank 0

        Type: DDR3

        Type Detail: Synchronous

        Speed: 1600 MHz

        Manufacturer: Samsung

        Serial Number: F16EF064

        Asset Tag: 01143900     

        Part Number: M471B5173DB0-YK0  

        Rank: 1

        Configured Clock Speed: 1600 MHz

        Minimum voltage:  1.350 V

        Maximum voltage:  1.500 V

        Configured voltage:  1.350 V

Handle 0x0007, DMI type 16, 23 bytes

Physical Memory Array

        Location: System Board Or Motherboard

        Use: System Memory

        Error Correction Type: None

        Maximum Capacity: 8 GB

        Error Information Handle: Not Provided

        Number Of Devices: 1

Handle 0x0006, DMI type 7, 19 bytes

Cache Information

        Socket Designation: CPU Internal L3

        Configuration: Enabled, Not Socketed, Level 3

        Operational Mode: Write Back

        Location: Internal

        Installed Size: 3072 kB

        Maximum Size: 3072 kB

        Supported SRAM Types: Unknown

        Installed SRAM Type: Unknown

        Speed: Unknown

        Error Correction Type: Single-bit ECC

        System Type: Unified

        Associativity: 12-way Set-associative

Handle 0x0005, DMI type 7, 19 bytes

Cache Information

        Socket Designation: CPU Internal L2

        Configuration: Enabled, Not Socketed, Level 2

        Operational Mode: Write Back

        Location: Internal

        Installed Size: 512 kB

        Maximum Size: 512 kB

        Supported SRAM Types: Unknown

        Installed SRAM Type: Unknown

        Speed: Unknown

        Error Correction Type: Single-bit ECC

        System Type: Unified

        Associativity: 8-way Set-associative

Handle 0x0004, DMI type 7, 19 bytes

Cache Information

        Socket Designation: CPU Internal L1

        Configuration: Enabled, Not Socketed, Level 1

        Operational Mode: Write Back

        Location: Internal

        Installed Size: 128 kB

        Maximum Size: 128 kB

        Supported SRAM Types: Unknown

        Installed SRAM Type: Unknown

        Speed: Unknown

        Error Correction Type: Single-bit ECC

        System Type: Other

        Associativity: 8-way Set-associative

Handle 0x0024, DMI type 4, 42 bytes

Processor Information

        Socket Designation: SOCKET 0

        Type: Central Processor

        Family: Core i5

 Manufacturer: Intel

        ID: 51 06 04 00 FF FB EB BF

        Signature: Type 0, Family 6, Model 69, Stepping 1

        Flags:

                FPU (Floating-point unit on-chip)

                VME (Virtual mode extension)

                DE (Debugging extension)

                PSE (Page size extension)

                TSC (Time stamp counter)

                MSR (Model specific registers)

                PAE (Physical address extension)

                MCE (Machine check exception)

                CX8 (CMPXCHG8 instruction supported)

                APIC (On-chip APIC hardware supported)

                SEP (Fast system call)

                MTRR (Memory type range registers)

                PGE (Page global enable)

                MCA (Machine check architecture)

                CMOV (Conditional move instruction supported)

                PAT (Page attribute table)

                PSE-36 (36-bit page size extension)

                CLFSH (CLFLUSH instruction supported)

                DS (Debug store)

                ACPI (ACPI supported)

                MMX (MMX technology supported)

                FXSR (FXSAVE and FXSTOR instructions supported)

                SSE (Streaming SIMD extensions)

                SSE2 (Streaming SIMD extensions 2)

                SS (Self-snoop)

                HTT (Multi-threading)

                TM (Thermal monitor supported)

                PBE (Pending break enabled)

        Version: Intel(R) Core(TM) i5-4210U CPU @ 1.70GHz

        Voltage: 1.2 V

        External Clock: 100 MHz

        Max Speed: 3800 MHz

        Current Speed: 1700 MHz

        Status: Populated, Enabled

        Upgrade: Socket rPGA988B

        L1 Cache Handle: 0x0004

        L2 Cache Handle: 0x0005

        L3 Cache Handle: 0x0006

        Serial Number: Not Specified

        Asset Tag: Fill By OEM

        Part Number: Fill By OEM

        Core Count: 2

        Core Enabled: 2

        Thread Count: 4

        Characteristics: 64-bit capable

Handle 0x0001, DMI type 1, 27 bytes

System Information

        Manufacturer: Dell Inc.

        Product Name: Inspiron 3542

        Version: Not Specified

        Serial Number: C6CQ332

        UUID: 4C4C4544-0036-4310-8051-C3C04F333332

        Wake-up Type: Power Switch

        SKU Number: 0652

        Family: Handle 0x0002, DMI type 2, 15 bytes

Base Board Information

        Manufacturer: Dell Inc.

        Product Name: 0926J6

        Version: A09

        Serial Number: .C6CQ332.CN762064AU00MZ.

        Asset Tag: Not Specified

        Features:

                Board is a hosting board

                Board is replaceable

        Location In Chassis: To Be Filled By O.E.M.

        Chassis Handle: 0x0003

        Type: Motherboard

        Contained Object Handles: 0

Handle 0x0003, DMI type 3, 22 bytes

Chassis Information

        Manufacturer: Dell Inc.

        Type: Portable

        Lock: Not Present

        Version: Not Specified

        Serial Number: C6CQ332

        Asset Tag: Not Specified

        Boot-up State: Safe

        Power Supply State: Safe

        Thermal State: Safe

        Security Status: None

        OEM Information: 0x00000000

        Height: Unspecified

        Number Of Power Cords: 1

        Contained Elements: 0

        SKU Number: To be filled by O.E.M.

Handle 0x0008, DMI type 8, 9 bytes

Port Connector Information

        Internal Reference Designator: J1A1

        Internal Connector Type: None

        External Reference Designator: PS2Mouse

        External Connector Type: PS/2

        Port Type: Mouse Port

Handle 0x0009, DMI type 8, 9 bytes

Port Connector Information

        Internal Reference Designator: J1A1

        Internal Connector Type: None

        External Reference Designator: Keyboard

        External Connector Type: PS/2

        Port Type: Keyboard Port

Handle 0x000A, DMI type 8, 9 bytes

Port Connector Information

  Internal Reference Designator: J2A2B

        Internal Connector Type: None

        External Reference Designator: Video

        External Connector Type: DB-15 female

        Port Type: Video Port

Handle 0x000B, DMI type 8, 9 bytes

Port Connector Information

        Internal Reference Designator: J3A1

        Internal Connector Type: None

        External Reference Designator: USB1

        External Connector Type: Access Bus (USB)

        Port Type: USB

Handle 0x000C, DMI type 8, 9 bytes

Port Connector Information

        Internal Reference Designator: J3A1

        Internal Connector Type: None

        External Reference Designator: USB2

        External Connector Type: Access Bus (USB)

        Port Type: USB

Handle 0x000D, DMI type 8, 9 bytes

Port Connector Information

        Internal Reference Designator: J3A1

        Internal Connector Type: None

        External Reference Designator: USB3

        External Connector Type: Access Bus (USB)

        Port Type: USB

Handle 0x000E, DMI type 8, 9 bytes

Port Connector Information

        Internal Reference Designator: J5A1

        Internal Connector Type: None

        External Reference Designator: LAN

        External Connector Type: RJ-45

        Port Type: Network Port

Handle 0x000F, DMI type 9, 17 bytes

System Slot Information

        Designation: J6B2

        Type: x16 PCI Express

        Current Usage: In Use

        Length: Long

        ID: 0

        Characteristics:

                3.3 V is provided

                Opening is shared

                PME signal is supported

        Bus Address: 0000:00:01.0

Handle 0x0010, DMI type 9, 17 bytes

System Slot Information

        Designation: J6B1

        Type: x1 PCI Express

        Current Usage: In Use

        Length: Short

        ID: 1

        Characteristics:

                3.3 V is provided

                Opening is shared

                PME signal is supported

        Bus Address: 0000:00:1c.3

Handle 0x0011, DMI type 10, 6 bytes

On Board Device Information

        Type: Video

        Status: Enabled

        Description: Mobile Intel HD Graphics

Handle 0x0012, DMI type 11, 5 bytes

OEM Strings

        String 1: Dell System

        String 2: 1[0652]

        String 3: 3[3.3]

        String 4: 4[0001]

        String 5: 6[D0, D4, D8, D9, DA, DB, DC, DD, DE]

        String 6: 10[A09]

 String 7: 13[P40F]

        String 8: 14[0]

        String 9: 15[11]

Handle 0x0013, DMI type 12, 5 bytes

System Configuration Options

        Option 1: To Be Filled By O.E.M.

Handle 0x0014, DMI type 21, 7 bytes

Built-in Pointing Device

        Type: Touch Pad

        Interface: Bus Mouse

        Buttons: 2

Handle 0x0015, DMI type 22, 26 bytes

Portable Battery

        Location: Sys. Battery Bay

        Manufacturer: SMP-SDI2.8         

        Serial Number: 1076         

        Name: DELL FW1MN31

        Chemistry: Lithium Ion

        Design Capacity: 28000 mWh

        Design Voltage: 14800 mV

        SBDS Version: 1.0                

        Maximum Error: 2%

        SBDS Manufacture Date: 2014-09-22

        OEM-specific Information: 0x00000001

Handle 0x0016, DMI type 32, 20 bytes

System Boot Information

        Status: No errors detected

Handle 0x0018, DMI type 27, 12 bytes

Cooling Device

        Type: Fan

        Status: OK

        OEM-specific Information: 0x00000000

Handle 0x0019, DMI type 28, 20 bytes

Temperature Probe

        Description: CPU Internal Temperature

        Location: Processor

        Status: OK

        Maximum Value: 127.0 deg C

        Minimum Value: 0.0 deg C

        Resolution: 1.000 deg C

        Tolerance: 0.5 deg C

        Accuracy: Unknown

        OEM-specific Information: 0x00000000

Handle 0xB000, DMI type 176, 10 bytes

OEM-specific Type

        Header and Data:

                B0 0A 00 B0 00 00 00 00 52 06

Handle 0xB100, DMI type 177, 12 bytes

OEM-specific Type

        Header and Data:

                B1 0C 00 B1 1A 0E 00 00 00 00 00 00

Handle 0x001C, DMI type 208, 12 bytes

OEM-specific Type

        Header and Data:

                D0 0C 1C 00 02 05 FE 00 52 06 01 02

        Strings:

                20141031

                20141031

Handle 0x001D, DMI type 212, 57 bytes

OEM-specific Type

        Header and Data:

                D4 39 1D 00 70 00 71 00 01 49 50 48 9C 00 49 FC

                01 9B 00 49 FC 00 7F 01 4A FB 04 80 01 4A FB 00

                53 01 4A F7 08 52 01 4A F7 08 7B 01 4A EF 10 7C

                01 4A EF 10 FF FF 00 00 00

Handle 0x001E, DMI type 216, 9 bytes

OEM-specific Type

 Header and Data:

                D8 09 1E 00 01 02 01 00 00

        Strings:

                INTEL

                0000

Handle 0x001F, DMI type 217, 8 bytes

OEM-specific Type

        Header and Data:

                D9 08 1F 00 01 02 00 00

        Strings:

Handle 0x0020, DMI type 219, 11 bytes

OEM-specific Type

        Header and Data:

                DB 0B 20 00 00 01 02 03 00 04 05

        Strings:

Handle 0x0021, DMI type 220, 22 bytes

OEM-specific Type

        Header and Data:

                DC 16 21 00 01 F0 00 00 02 F0 00 00 00 00 03 F0

                04 F0 00 00 00 00

Handle 0x0022, DMI type 221, 19 bytes

OEM-specific Type

        Header and Data:

                DD 13 22 00 00 00 00 00 00 03 00 00 00 00 00 00

                00 00 00

Handle 0x0023, DMI type 222, 16 bytes

OEM-specific Type

 Header and Data:

                D8 09 1E 00 01 02 01 00 00

        Strings:

                INTEL

                0000

Handle 0x001F, DMI type 217, 8 bytes

OEM-specific Type

        Header and Data:

                D9 08 1F 00 01 02 00 00
        Strings:
Handle 0x0020, DMI type 219, 11 bytes

OEM-specific Type

        Header and Data:

                DB 0B 20 00 00 01 02 03 00 04 05

        Strings:

Handle 0x0021, DMI type 220, 22 bytes

OEM-specific Type

        Header and Data:

                DC 16 21 00 01 F0 00 00 02 F0 00 00 00 00 03 F0

                04 F0 00 00 00 00

Handle 0x0022, DMI type 221, 19 bytes

OEM-specific Type

        Header and Data:

                DD 13 22 00 00 00 00 00 00 03 00 00 00 00 00 00

                00 00 00

Handle 0x0023, DMI type 222, 16 bytes

OEM-specific Type

  Header and Data:

                DE 10 23 00 01 08 FF FF 00 00 00 00 00 00 00 00

Handle 0x002F, DMI type 127, 4 bytes

End Of Table


dmidecode is a tool for dumping a computer's DMI (some say SMBIOS) table contents in a human-readable format. This table contains a description of the system's hardware components, as well as other useful pieces of information such as serial numbers and BIOS revision. Thanks to this table, you can retrieve this information without having to probe for the actual hardware. While this is a good point in terms of report speed and safeness, this also makes the presented information possibly unreliable. The DMI table doesn't only describe what the system is currently made of, it also can report the possible evolutions (such as the fastest supported CPU or the maximal amount of memory supported). SMBIOS stands for System Management BIOS, while DMI stands for Desktop Management Interface. Both standards are tightly related and developed by the DMTF (Desktop Management Task Force). As you run it, dmidecode will try to locate the DMI table. If it succeeds, it will then parse this table and display a list of records
1 comments :

How to view saved password of wifi on android device?

3:53:00 PM Mahesh Kumar Yadav 0 Comments


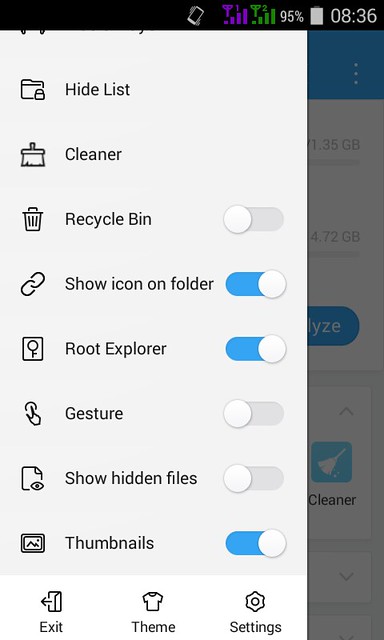
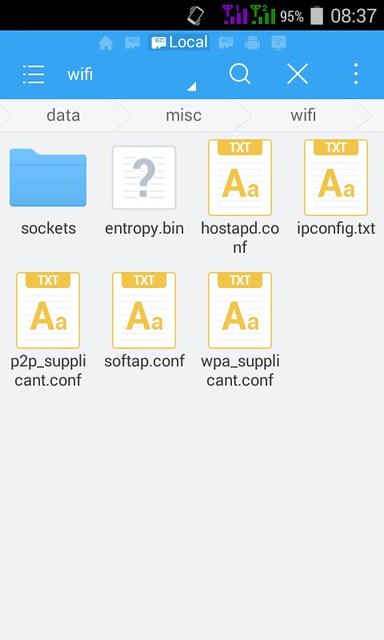
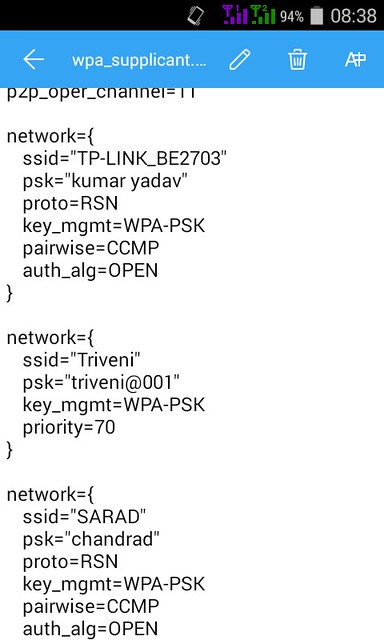
Install ES File Explorer then navigate to data/misc/wifi folder and you will find a file named wpa_supplicant.conf. Tap on the file to open it up and make sure you use ES File Explorer 's built-in text/HTML viewer for the task. In the file you should be able to see the network SSID and their passwords next to it.

Required:

Rooted Android Device and root privilege to ES File Manager.

Root Es File Manager

File Explore In Es File Manager

View Password

Now, you can see the ssid and password saved on your android.

0 comments :